Accessing the Groups directory
Publishing with iWeb to the file server
Publishing with iWeb to shared team directories on the sandbox server
There is no remote access to the Multimedia Lab LAN and its servers. In the lab, users can log into the client systems with their account name and password, or they can use the default username and password (mmstudent, mmlab). User accounts reside on the file server, but the default login saves user files to the local machine.
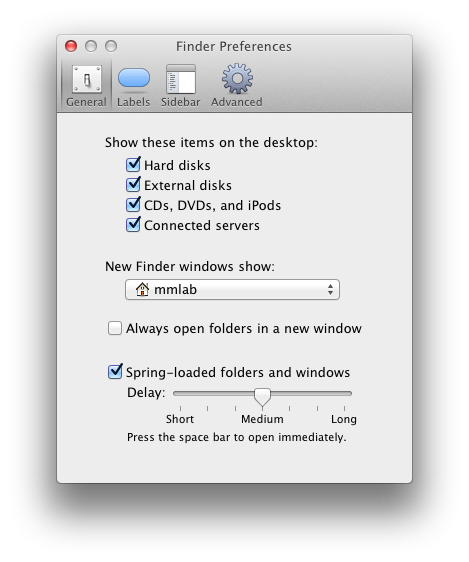
The first thing users should do is configure the Finder so that they can see the local hard drive, external drives and optical media, and networked servers mounted on the desktop. Under Finder > Preferences, set the dialog as follows:
Note that the Finder window is set to show the account the user logged in with, which is where their files are saved.
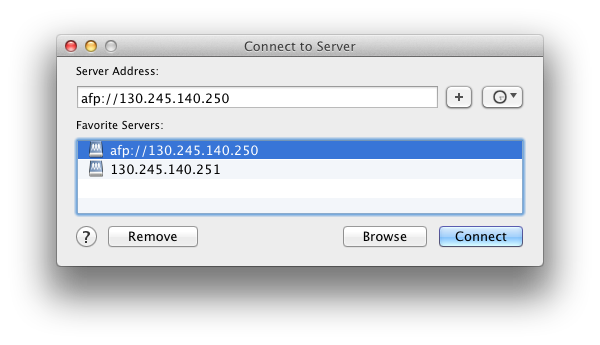
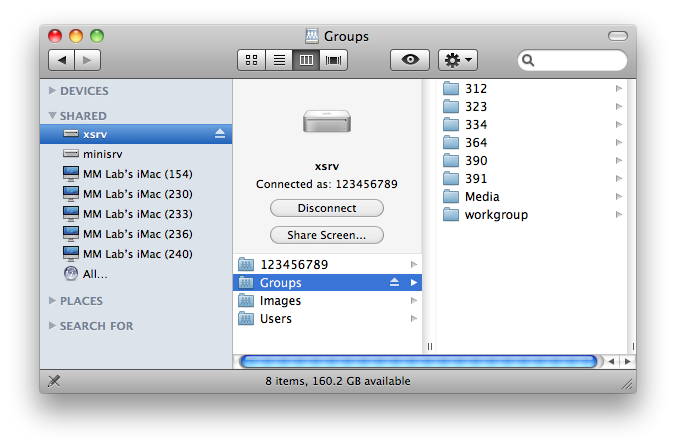
Users who wish to access the shared Groups directory on the file server (to download tutorials, media assets, documents, and so on) will need to mount that directory on their machine. In the Finder, select Go > Connect to Server... as shown below. The IP address for the file server is 130.245.140.250.
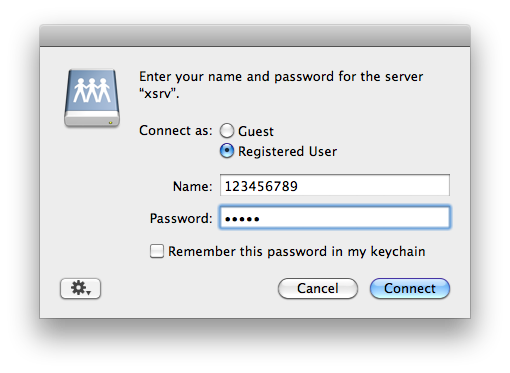
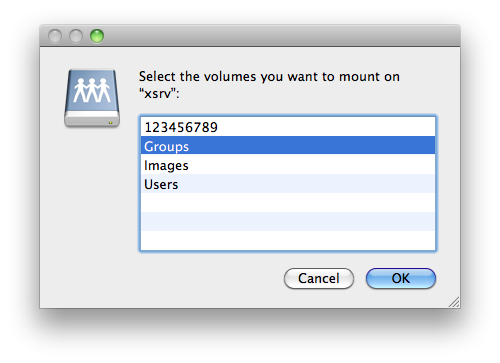
Users will be asked to login in again, and then will be presented with a dialog where they can select the Groups directory.
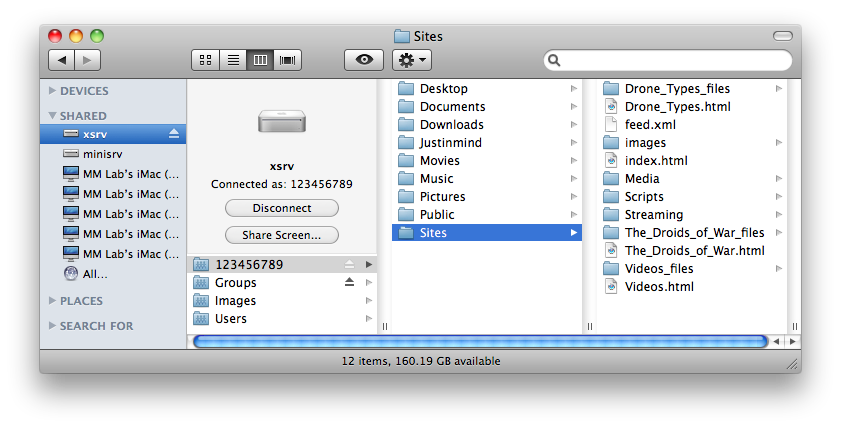
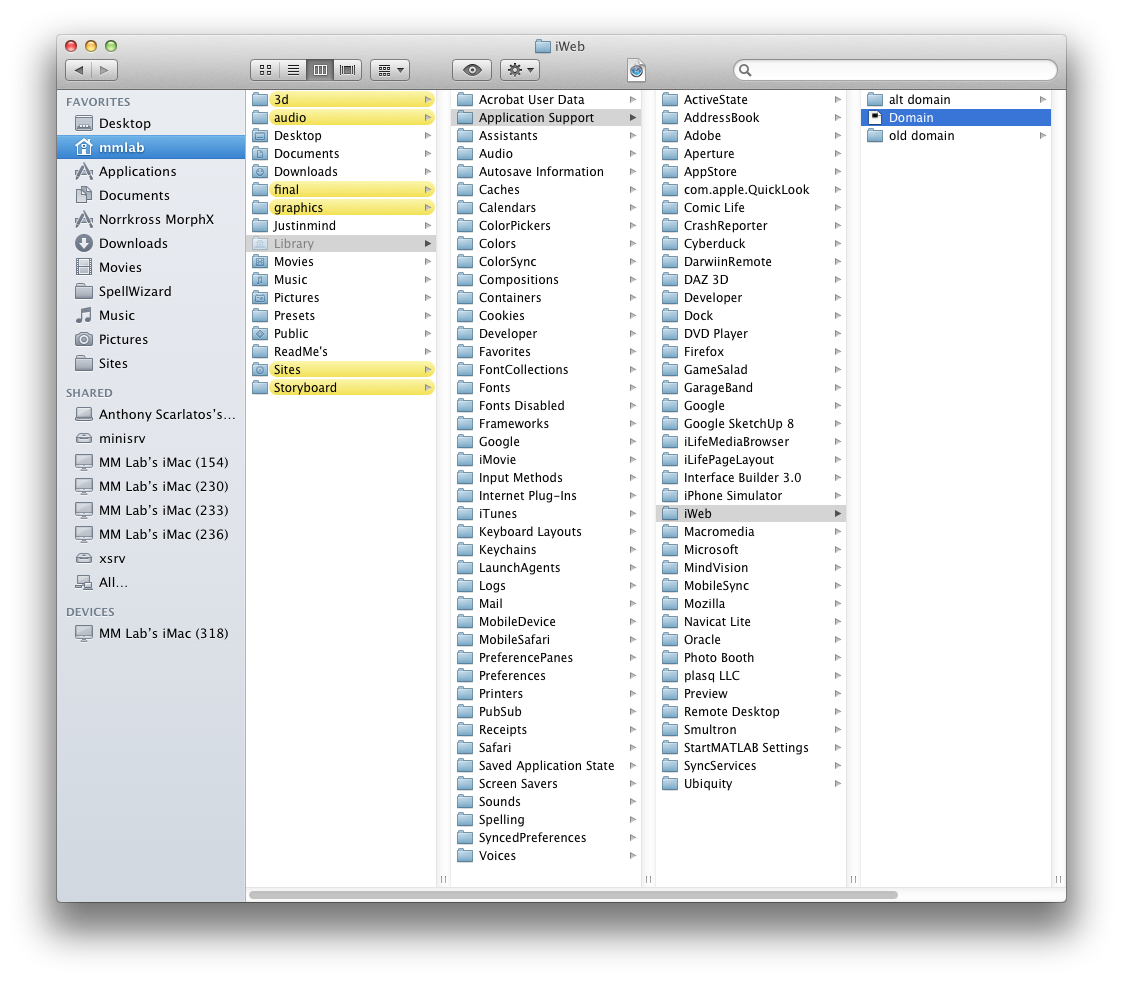
Many courses given in the lab require students to maintain project documentation as a web site hosted from their account on the file server. That documentation has to reside in the Sites directory of their account, as shown below:
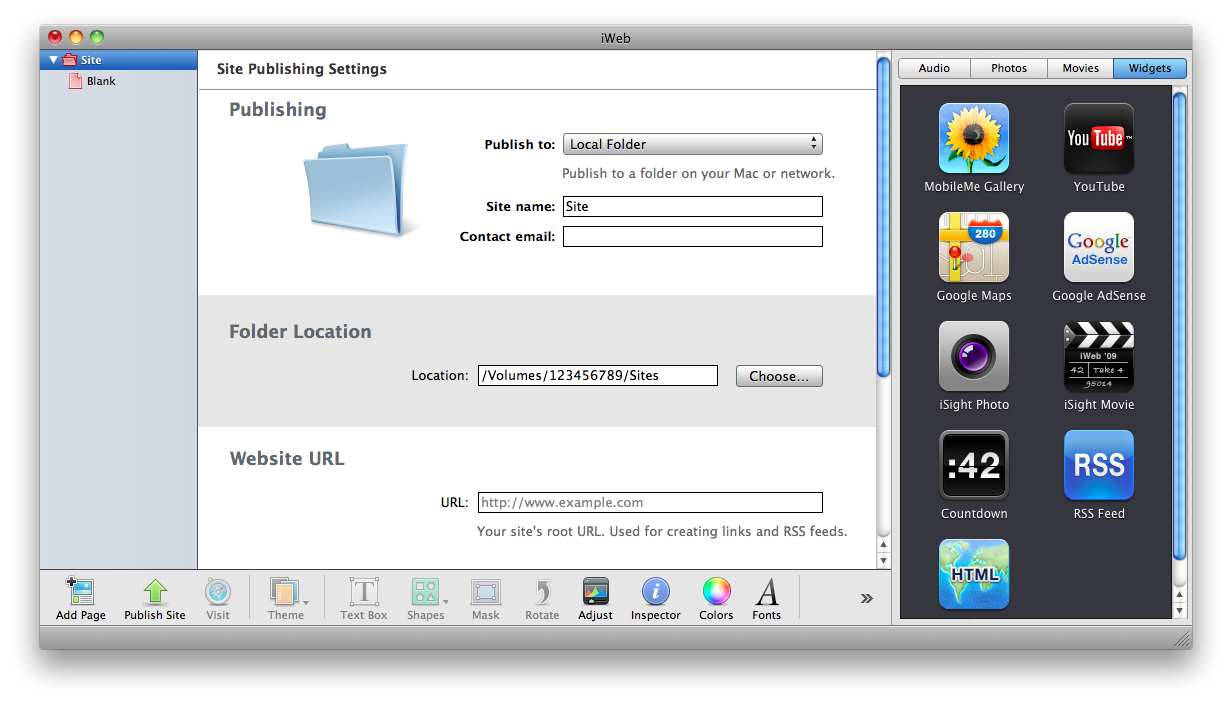
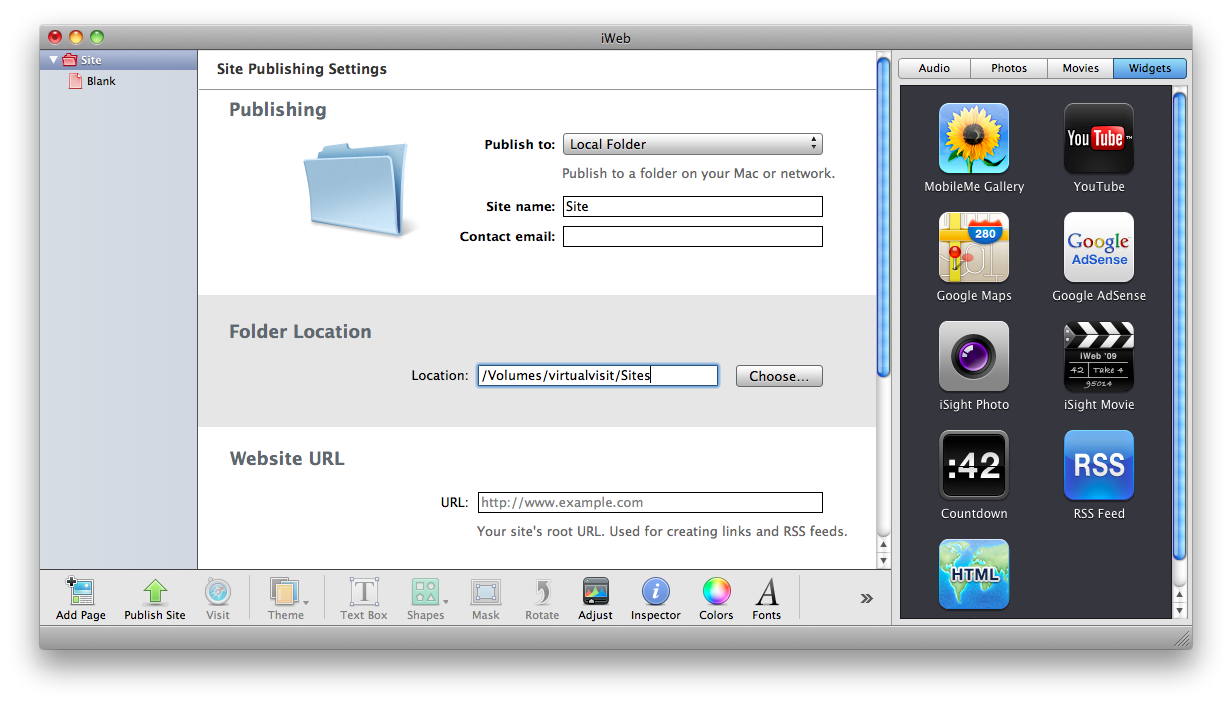
In the lab students can use the iWeb application to generate the html for their project documentation. They will need to launch iWeb and create a new site. In the properties dialog for the site, users will need to set the publishing property to Local Folder, and use the Folder Location Choose... button to select their Sites folder in their account, as shown below:
Students can then create additional pages, import assets, and otherwise build and edit their site. When they are done, they will need to save the iWeb file by selecting File > Save. After that they can publish their site by selecting either File > Publish Entire Site or File > Publish Site Changes. When published their site can be viewed at this address http://www.mm.cs.sunysb.edu/~account_name (as in http://www.mm.cs.sunysb.edu/~123456789).
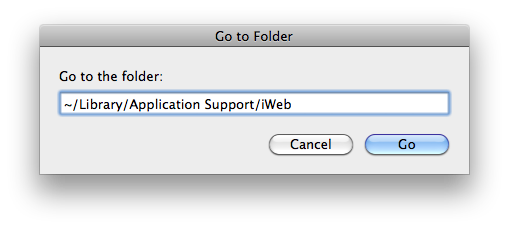
iWeb stores all the html and media assets for the web sites a user creates in a single binary file. If a user wants to copy that file to their home machine they need to access it by choosing Go > Connect to Folder... in the Finder. The path is shown below:
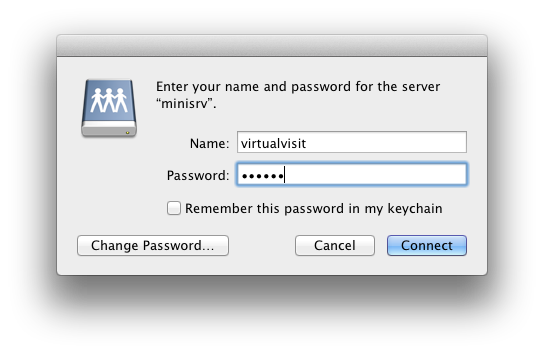
In some classes taught in the lab students work in teams and develop projects and provide documentation from a shared directory on the sandbox server. To access the sandbox server, users should select Go > Connect to Server... in the Finder. The IP address for the sandbox server is 130.245.140.251.
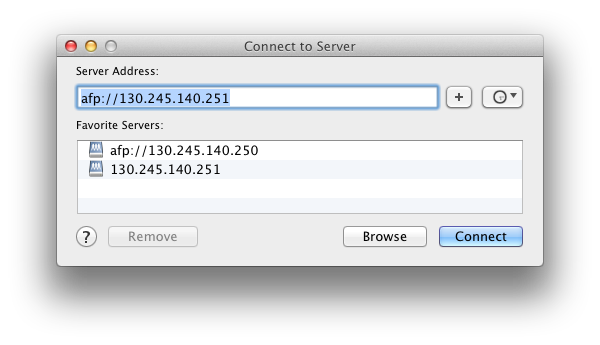
Users will login with their team name and the password they have been assigned.
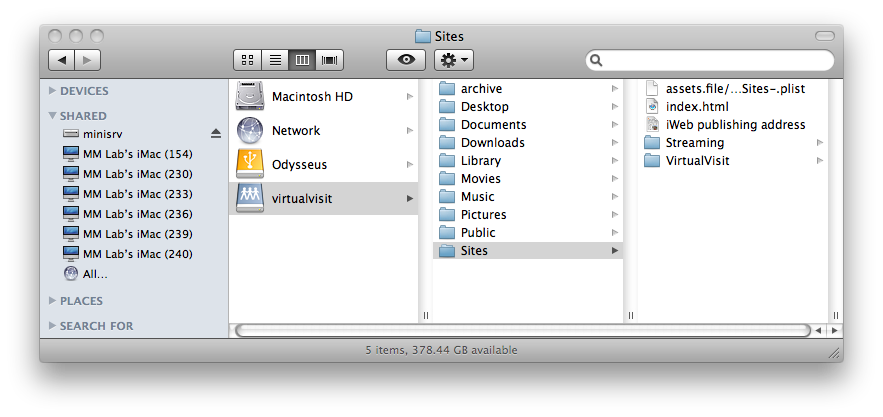
As with individual accounts on the file server, iWeb needs to be set to publish to the team's Sites folder in their shared account on the sandbox server, as shown below:
The published web site can be viewed at this address http://www2.mm.cs.sunysb.edu/~team_account_name