Setting Sprite Properties with Lingo: A Step-by-Step Example
|
|
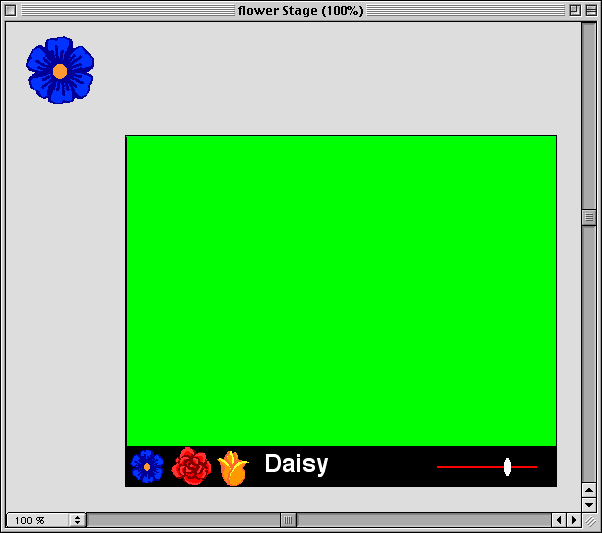
Flower Power
- Click on the green background to
put a flower there
- Use the slider to change the size
of the flowers
- Click on a flower icon to add different
flowers
|
Setting Up:
 Launch
Director and start a new movie (select File -> New from the menu
bar).
Launch
Director and start a new movie (select File -> New from the menu
bar).- Using the Paint window (and/or the File -> Import option), create
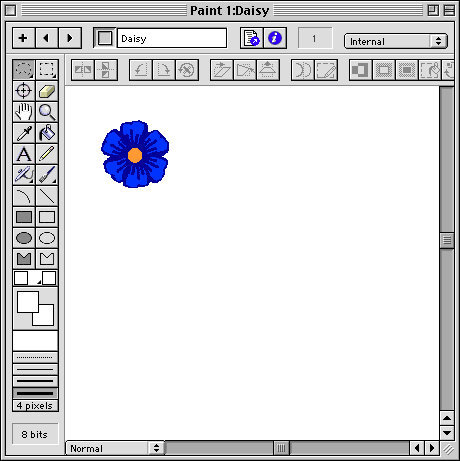
3 small bitmapped cast members representing 3 different things. Be sure to
give each cast member a descriptive name.
- Using the Tool Palette window, create a filled rectangle that covers most
of the stage.
- Click on the filled rectangle icon (in the left column of the Tool Palette)
- Select a foreground color. Actually, this will be a background against
which you will place the other cast members.
- Click on the Stage near the upper-left corner, then drag down and to
the right (still holding down the mouse button) until the rectangle covers
most of the stage. Release the mouse button.
- Position one of yourother cast members off-Stage.
- Select a cast member, and drag it onto the stage.
- With that sprite still selected (it appears outlined on the Stage),
set the Ink to Matte (selected at the top of the Score window).
- Now select Modify -> Sprite -> Properties from the menu
bar.
- Set the Left part of the Location to the negative Width of your sprite.
For example, if the Width (Size) is 100, set Left to -100.
- Set the Top part of the Location to the negative Height of your sprite.
- Click on OK to save these changes.
- Make the movie loop endlessly on the first frame
- Open up the Score window. You should see that the rectangle is in sprite
channel 1, and the off-stage cast member is in sprite channel 2.
- Double-click on the script channel in frame 1.
- Type "go to the frame" in the script window. Your script should look
like this:
on exitFrame
go to the frame
end
This tells Director to re-enter the current frame (the frame) after it
exits the frame.


Puppets - Controlling Sprites:
The Score typically controls sprites on the stage: where they appear, what
cast member they are associated with, etc. You can also use Lingo to control
a sprite. But what if the Lingo commands and the Score contradict one another?
Director takes care of this with the puppetSprite command:
puppetSprite 1, TRUE -- properties of sprite 1 will be
controlled by Lingo
puppetSprite 1, FALSE -- properties of sprite 1 will be
controlled the Score
By default, the Score controls the sprites. Any Lingo commands
regarding the sprites are ignored. But from the time you make a
sprite a puppet, Lingo controls that sprite; anything further in that
sprite channel of the Score will be ignored. If you find that a
sprite isn't doing what you expect it to do, check to see whether it
is a puppet or not.
You are now going to make sprite 2 (where you have your off-stage sprite) a
puppet.
- Create a new Movie script.
- Open the Script window
- Click on the "+" button (in the upper-left corner of the
window) to create a new script
- Click on the information ("i") button near the top of the
window. If Type is not Movie, click on the arrow and select
Movie.
- Create a handler for the startMovie event that makes sprite 2
a puppet. To do this, type the following in the current script
window:
on startMovie
puppetSprite 2, TRUE
end
- Create a handler for the stopMovie event that returns control
of sprite 2 to the Score. To do this, type the following after the
startmovie handler in the current script window:
on stopMovie
puppetSprite 2, FALSE
end
Setting Sprite Properties:
Basically, you set a sprite property using the following syntax:
set the <property> of sprite <number> to
<value>
where <property> is some property of the sprite,
<number> is the number of a sprite that you have
previously made a puppet, and <value> is an
appropriate value. If you select the Categorized lingo button (on the
Script or Message window) and scroll down to Sprites, you will find a
list (two, actually) of sprite properties that you can set with
Lingo.
The first property that you will set is the trails
property. By default, the trails property is off: as you move a
sprite on the Stage, you see the sprite in its new location only,
with no indication of where it was before. When the trails property
is on, the moving sprite leaves a trail, or after-image, in every
place it has appeared previously. Set the trails property of sprite 2
in the startMovie handler (that you just created) so that the handler
now looks like this:
on startMovie
puppetSprite 2, TRUE
set the trails of sprite 2 to TRUE
end
Linking Sprite Location to the Mouse Location:
In addition to setting sprite properties to explicit values, you
can have them take on other values that are stored in Director's
variables. One of these variables is the mouseLoc, which
stores the current location of the mouse pointer on the Stage.
At the end of this step you will have a movie that will place a copy of your
picture (the cast member associated with sprite 2) everywhere you click (as
long as it's within the rectangle on Stage). Be sure to save your movie (as
"version1") and try it out.
- Create a new Score script.
- Open the Script window
- Click on the "+" button (in the upper-left corner of the window) to
create a new script
- Click on the information ("i") button near the top of the window. If
Type is not Score (or Behavior in Director 7), click on the arrow and
select Score (or Behavior).
- In this new script, write a handler corresponding to the mouseDown event
that sets the location of sprite 2 to the location of the mouse pointer.
- Type the following in the Script window:
on mouseDown
set the loc of sprite 2 to the mouseLoc
end
- Take note of the (cast member) number of the script, and then close
the Script window
- Link this new script to sprite 1 (the background rectangle)
- Open the Score window
- Select sprite 2 in the Score
- Near the top of the Score window, near the Inks, there is a blank box
with a small triangle in the lower-right corner. Click on that triangle,
and then scroll down to select a script to link to the current sprite.
- When the correct script is selected, release the mouse button. The number
and initial text of that script should appear in the box that was previously
blank.
- Save and play your movie.
Creating Buttons:
- Create a rectangular menu area at the bottom of the Stage.
- Open the Tool Palette window
- Click on the filled rectangle icon
- Select a foreground color. Actually, this will be a background on which
you will place your buttons.
- Click on the Stage near the lower-right corner, then drag up and to
the left (still holding down the mouse button) until the rectangle is
an appropriately sized region at the bottom of the stage. Release the
mouse button.
- Place copies of your 3 pictures over this menu area. These
will be your custom buttons.
- Open the Cast window.
- Drag each of the 3 pictures from the Cast window onto the
Stage.
- Resize each of the custom buttons so they fit nicely within
the menu area. You can resize a button by
- dragging the handles (small boxes along the outline
around the sprite on Stage) until the button is the right
size, or
- selecting Modify -> Sprite -> Properties
from the menu bar, and setting the Width and Height
explicitly.
General Purpose Sprite Scripts:
You will now write the Lingo code that will change the thing (cast member)
that gets copied to the stage when you click on it. You could do this by writing
a separate script for each button. Instead, we'll write one general-purpose
script that you can share among several sprites. When you have finished, be
sure to save your movie (as "version2") and try it out.
- Write a script that will change the cast member associated with sprite 2.
- Link this script to each of the custom buttons in the menu area.
- Open the Score window.
- Find the sprites corresponding to the 3 buttons you placed at the bottom
of the Stage, and highlight them.
- At the top of the Score window, find the script window that shows
what script is associated with the highlighted sprite(s). Click on the
arrow in the lower-right corner of this window and scroll down until you
find PickPicture.
- Save and play your movie.
Fields:
Lingo supports a fair amount of text processing. You can use Lingo to write
messages, notes, whatever, as needed, on the stage. You can also use Lingo to
capture whatever the user types, then parse and process it. All of this is done
with fields.
A field is a cast member that contains text. Unlike a text cast member, you
can use Lingo to change the text in that cast member. You can also make the
cast member editable, which means that the user can change the text in
that cast member. In this part of the exercise, you will create a field that
shows the name of the cast member currently being used by sprite 2.
- Create a new field
- Open up the Tools Palette window.
- Select the Field button in the Palette window.
- Set the foreground (text) and background colors for the
field.
- Click on the Stage, and then type "Cast" in the new
field.
- If you want, you can highlight the word "Cast" in the field
and change the color, font, size, and style.
- Name the field "tag"
- Open the Cast window.
- Find the new field cast member you just created, and click
on it once to select it.
- Near the top of the Cast window, type the word "tag".
- Position the new field next to the set of buttons in your menu
area.
Writing Text:
You currently have a field that always says the same thing. Now
you will modify it to reflect what cast member is associated with
sprite 2. To do this, you must put text into
field.
- Initialize "tag" with the appropriate label in your startMovie
handler.
- In the Cast window, double-click on the cast member that
contains the startMovie handler. The Script window should
appear with the correct script in it.
- Just below the line where you make sprite 2 a puppet, add
the following lines of code:
set i = the memberNum of sprite 2
put the name of member i into field "tag"
- Modify your "PickPicture" script such that the text in "tag"
changes when the cast member changes.
- Back in the Cast window, double-click on the PickPicture
cast member, or use the arrow buttons in the Script window to
advance to the correct script.
- After the last line of the mouseUp handler, just
above the end line, type the following line:
put the name of member i into field "tag"
- Close the Script window, then save and run your movie.
Remember to save your movie as a new version!
Reading Text:
Now you will make modifications allowing the user to type in a label and have
that change the cast member. To do this, you will create a custom handler,
set a keyDownScript, and use a global variable to keep track of whether the
label needs updating.You will also have to check the label to make sure that
it is the valid name of a cast member.
- Make the "tag" field editable.
- Make the cast member editable.
- Open the Cast window.
- Click once on "tag" to select it.
- Click on the "i" button near the top of the Cast window. A pop-up
window labeled "Field Cast Member Properties" should appear.
- Under Options, check the box marked Editable.
- Close the pop-up window.
- Alternatively, make the sprite editable.
- Open the Score window.
- Click once on the "tag" sprite (i.e. the one that places the "tag"
field on the Stage) to select it.
- Click on the Editable button to make the sprite Editable
- Write a custom handler that changes the cast member associated with sprite
2 when the user types in a new name and then presses the RETURN key.
- Create a new Movie script.
- Create a handler called enterKey by typing the following in the Script
window:
on enterKey
end enterKey
- This handler shouldn't do anything until the RETURN key is pressed.
Inside the handler (i.e. between the 1st and last lines), add an if
statement to check the last key that was pressed:
if the key = RETURN then
end if
- Create a global variable that will keep track of whether the RETURN
key was pressed.
- Declare a global variable called in the 1st line of the handler:
global updateName
- Set the value of the global variable to TRUE inside the if
statement:
set updateName = TRUE
- Also within the if statement, get the member number corresponding
to the member name typed in the "tag" field:
set name = field "tag"
set i = the number of member name
- If the "tag" field contains a valid member name, then change the member
associated with sprite 2.
- After the line where you set i, add an if statement
to see if the member number is valid. (Any value greater than 0 will
be valid.):
if i > 0 then
end if
- Inside this if statement, change the cast member associated with
sprite 2:
set the memberNum of sprite 2 to i
- Move sprite 2 off-Stage:
set the loc of sprite 2 to point(-100, -100)
The finished handler should look like this:
on enterKey
global updateName
if the key = RETURN then
set updateName = TRUE
set name = field "tag"
set i = the number of member
name
if i > 0 then
set
the memberNum of sprite 2 to i
set
the loc of sprite 2 to point(-100, -100)
end if
end if
end enterKey
- Now that you've created your handler, ensure that it always gets called
first by making it the keyDownScript
- In the Script window, find the Movie script that contains the
startMovie handler.
- Within that handler (i.e. after the first line but before the last line),
set the keyDownScript with the following line:
set the keyDownScript to "enterKey"
- Make sure your "tag" always contains the correct name by updating it (if
needed) every time the frame changes.
- In the Script window, find the Score script that contains the
exitFrame handler.
- Add the following first lines to the handler, to update "tag" if the
name has been updated
global updateName
if updateName then
set i = the memberNum of sprite 2
set name = the name of member i
put name into field "tag"
end if
- Reset the global variable updateName so it doesn't keep updating:
set updateName = FALSE
- Save your movie, then test it. See what happens when you do the following:
- Place the cursor at the end of tag and press RETURN.
- Place the cursor in the middle of the end of tag and press RETURN.
- Highlight the entire label, type in the name of another cast member
and press RETURN.
- Highlight the entire label, type in gibberish, and press RETURN.
- Highlight the entire label, and press RETURN.
Cursors:
You will finish up your application by introducing a custom cursor, and a slider
for setting the size of the sprite.
The cursor is a graphic symbol that tracks the mouse location on-screen. By
default, the cursor looks like an arrow. We can also change the cursor to reflect
capabilities, or to show that the cursor is over a special area. You will now
learn to create your own custom cursor.
- Draw your own custom cursor in the Paint window. Your cursor
MUST be black and white, and 16x16 pixels in dimension.
- In the Paint window, click on the "+" symbol to create a
new bitmap.
- Change your bitmap to black & white:
- Select Modify -> Transform Bitmap from the
menu bar.
- In the pop-up window, change the Color Depth to 1
Bit.
- Zoom out as much as possible
- Select View -> Zoom -> 800% from the menu
bar, or
- Click on the magnifying glass, then click inside the
window until the scale no longer changes.
- Set the rulers so that they show the indivual pixels.
- Choose View -> Rulers from the menu bar.
- Very carefully outline a square area 16 pixels x 16 pixels
in dimension.
- Draw your icon within this square area.
- Type a name for your new cursor (call it "cursor") in the
appropriate area near the top of the Paint window.
- Associate this new cursor with the background (sprite 1),
indicating that clicking over it will copy a picture there.
- Open the Script window and find the startMovie handler
- Inside this handler, type the following lines:
set i = the number of member "cursor"
set the cursor of sprite 1 to [i, i]
- Save and play your movie. The cursor should change when you
move it over the background!

Sliders - Moveable Sprites and Constraints:
Sliders are an intuitive input device that allows a user to change
a numeric value simply by shifting an indicator along a bar. In this
case, you will use the position of the indicator to determine a
height and width for sprite 2 (i.e. the sprite that
stamps pictures on the background). The key thing to notice is that
the user can move the indicator (i.e. it is moveable), but
only within the allowed constraint.
- Create the graphic elements for your slider. These include
- a small indicator that contrasts well against the lower menu bar,
- a brightly colored thin rectangle to slide the indicator along, and
- another thin rectangle -- only 1 pixel high, but the same length as
the previous rectangle -- which is the same color as the menu bar (background).
- Position the graphic elements on the menu bar, adding them in the order
opposite that indicated above (i.e. the indicator goes on top). Although you
don't have to use the sprite channels I've suggested here, be aware
that you must refer to the correct sprite channels in the instructions
later on.
- Put the thinnest rectangle in sprite channel 20. You should not be able
to see this rectangle.
- Put the other thin rectangle in sprite channel 21.
- Put the indicator in sprite channel 22.
- Add instructions to the startMovie handler to setup the slider.
- Align the sprites that you just placed on stage. The horizontal position
of the indicator should reflect the original size of sprite 2 (the picture
that gets stamped onto the stage).
set the loc of sprite 20 to the loc of sprite 21 -- align the 2 rectangles
set the locv of sprite 22 to the locv of sprite 20 -- vertical alignment of indicator
set the loch of sprite 22 to (the left of sprite 20) + (the width of sprite 2) -- horizontal alignment
- Make the indicator moveable, but constrain it to the one-pixel-high
bar.
set the constraint of sprite 22 to 20
set the moveableSprite of sprite 22 to true
- Also add (in the startMovie handler) statements that define a global variable
ratio that allows you to retain the correct aspect ratio for your
pictures as you scale them up and down.
- Define the global variable in the top line of the movie script
global ratio
- Set its value inside the startMovie handler
set ratio = float(the height of sprite 2) / float(the width of sprite
2)
- Write a cast or score script -- associated with the indicator -- that sets
the height and width for sprite 2 when the mouse button
is released (on mouseUp).
- Declare ratio again, at the top of the script, so that you
can use it here.
global ratio
- Use the indicator position to set the width
set w = (the loch of sprite 22) - (the left of sprite 20)
set the width of sprite 2 to w
- Multiply by the global variable to set the height
set the height of sprite 2 to (w * ratio)
- Move the sprite off-screen
set the loc of sprite 2 to point(-100, -100)
- Save and play your movie. See what happens as you change the slider. Adjust
the size of the slider (using Modify -> Sprite -> Properties)
to get the appropriate scaling range.


